Animating a travel-map route for a vlog in After Effects
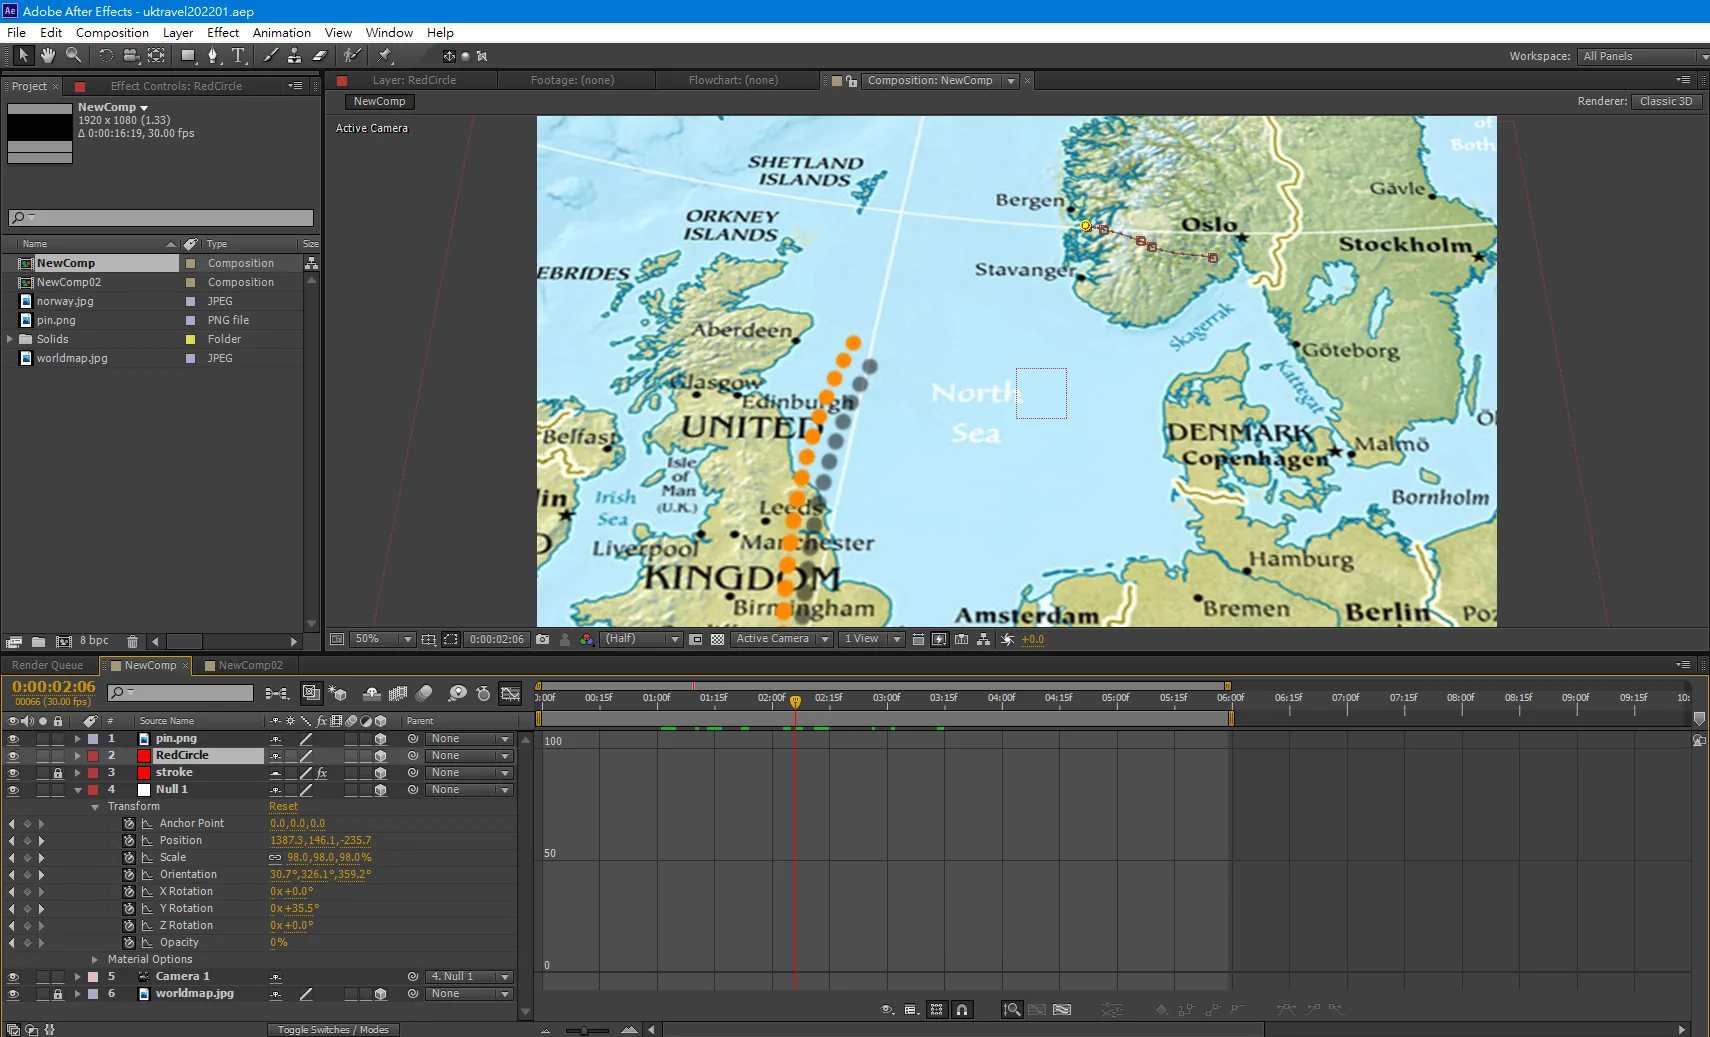
After coming back from a trip I had the sudden idea of cutting the footage into a vlog. To animate the route on a map I found an After Effects technique and gave my newly learned skills a quick try. It needs 3D layers and a camera, and it really isn’t that complicated.
How the composition is built
The effect is a small stack of layers, from the bottom up:
- The map (worldmap.jpg): a high-resolution map image on a 3D layer, so it stays sharp when the camera moves in.
- The route (stroke): a mask path drawn along the journey, outlined with the Stroke effect, with its End value keyframed from 0% to 100% so the line draws itself. A shape layer with Trim Paths does the same job.
- Location markers (pin.png and RedCircle) for the start and the destination.
- Null 1 and Camera 1, which together create the “flying” shot.
Let the camera ride a null
The trick is not to keyframe the camera directly. Instead, parent Camera 1 to Null 1 and keyframe the null’s position and rotation. Moving one null is much easier to control than juggling a camera’s position and point of interest. In the screenshot, Null 1 has a Y rotation of 35.5°, which tilts the map in 3D space and gives the shot depth.
- Add a null object and enable its 3D switch.
- Add a camera and set its Parent to the null.
- Keyframe the null’s Position at the start of the route and again at the end; add a little rotation if you like.
- Apply Easy Ease so the move starts and settles naturally, and enable motion blur for a smoother result.
- Time the route’s stroke to the null’s movement, so the camera appears to chase the line across the map.
The finished video
[ VLOG ] Norway snow adventure, Part I | Exploring Bergen – skiing at Myrkdalen
Reference tutorial
Clean 3D Animated Travel Map Tutorial in After Effects, by Ignace Aleya.