From 2D concept to a playable 3D character in Unity
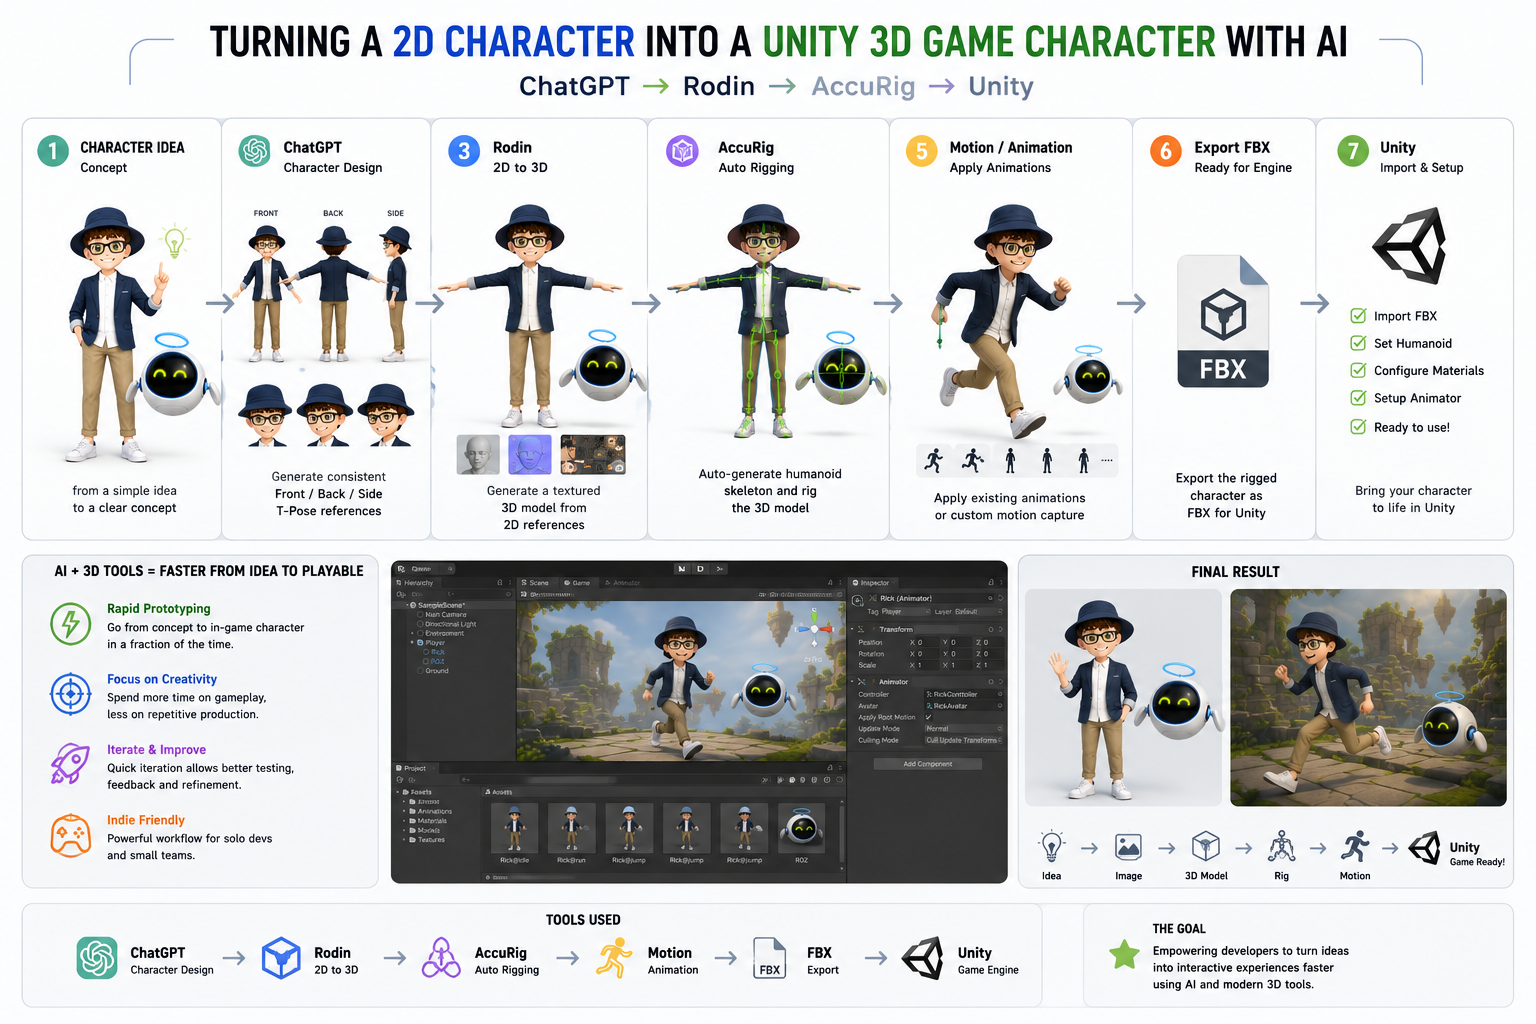
A character can look finished in a concept image and still be a long way from playable. The useful question is not simply whether an AI tool can make a 3D model. It is whether the whole chain produces a character with a stable identity, clean movement and files that are easy to revise inside Unity.
This is the workflow I use for rapid prototypes: idea → turnaround → 3D generation → cleanup → rig → animation → Unity. ChatGPT helps define the design, Rodin creates the first textured mesh, AccuRig establishes the humanoid skeleton, and Unity is where the result becomes a game character.
1. Begin with a production brief
Before generating images, write down the decisions the model must preserve: age range, silhouette, clothing layers, colour palette, footwear, accessories and the intended game camera. A third-person character needs readable shapes from behind; a small mobile character needs fewer fine details than a close-up cinematic model.
I also specify what must remain identical in every view. For Rick, that list includes the navy hat and blazer, round glasses, white shirt, tan trousers and white trainers. These anchors matter more than decorative details.
2. Generate a clean turnaround
Create front, back and side views in a neutral T-pose or relaxed A-pose. Use an even white background, consistent lighting and the same scale in every panel. Avoid crossed arms, props, dramatic perspective and fabric that hides the hands or legs. The images are reference sheets, so clarity is more useful than atmosphere.
Check the sheet manually before moving on. AI images often change the number of buttons, the shape of glasses or the length of a jacket between views. Fix those contradictions now; a 3D generator cannot reliably guess which version is correct.
3. Generate the first textured mesh
Import the strongest reference into Rodin or another image-to-3D tool. Aim for a neutral pose and a complete body. Inspect the silhouette, face, fingers, shoe soles and areas where clothing overlaps. The first output is a starting mesh, not a finished asset.
For a prototype, prioritise a recognisable silhouette and intact topology around shoulders, elbows, hips and knees. Those areas must deform during animation. Retopology, texture repair and separating accessories can wait until the design survives a gameplay test.
4. Prepare the model for rigging
- Remove hidden or floating geometry.
- Apply transforms and confirm a sensible real-world scale.
- Place the feet on the ground plane and face the model forward.
- Keep hands clear of the body and leave a small gap between the legs.
- Export a backup before changing topology or materials.
5. Auto-rig, then verify the skeleton
Load the cleaned character into AccuRig and place the humanoid guides at the chin, shoulders, wrists, hips, knees and ankles. Auto-rigging saves time, but the result still needs a deformation test. Rotate every major joint and look for collapsing shoulders, bent wrists, sliding knees and clothing that cuts through the body.
Test one walk, one run and one exaggerated action before downloading a large animation library. These three clips reveal most proportion and skin-weight problems quickly.
6. Export FBX with a predictable structure
Export the mesh, skeleton and textures as FBX. Keep one master character file and separate animation files where practical. Use clear names such as Rick_Base.fbx, Rick_Run.fbx and Rick_Wave.fbx. Consistent names make re-importing safer when the model changes.
7. Configure the character in Unity
- Import the FBX and textures into a dedicated character folder.
- Set Rig → Animation Type to Humanoid, then create and validate the Avatar.
- Extract or assign materials and check normal-map and transparency settings.
- Create an Animator Controller with idle, walk and run states.
- Place the character in a simple test scene and check scale, foot contact, shadows and camera readability.
// A minimal movement value for an Animator blend tree
Vector3 planarVelocity = new Vector3(rb.velocity.x, 0f, rb.velocity.z);
animator.SetFloat("Speed", planarVelocity.magnitude, 0.1f, Time.deltaTime);
Prototype first, polish after the character proves itself
The main advantage of this workflow is speed of learning. I can test a character’s scale, movement and personality in the game before spending days on final topology. The final pass may still need manual modelling, UV cleanup, texture work, facial shapes and careful skin weights. AI reduces the distance from idea to first playable version; it does not remove art direction or technical judgement.
The same pipeline supports the character studies behind Project NightFall and DollCaptor.